
2.4. Time-Lapse Recordings#
In time-lapse recordings, spectra are recorded at regular intervals, e.g. to monitor a chemical reaction. TII Spectrometry supports two time-lapse modalities:
regular time-lapse. Here, timing is controlled by the host PC and spectra are acquired at a regular, user-defined interval. This mode
supports software synchronization of multiple spectrometers (Figure 2.25).
spectra are updated in real time
On the other hand, this mode is unsuitable for high spectral acquisition rates and the software-based timing makes some timing jitter unavoidable.
Note
While the maximum throughput of the regular time-lapse mode depends on the connection speed, CPU load and other factors, a good role of thumb is that the maximum rate will be around 20Hz.
Time-lapse mode can be accessed using , which shows the time lapse window.
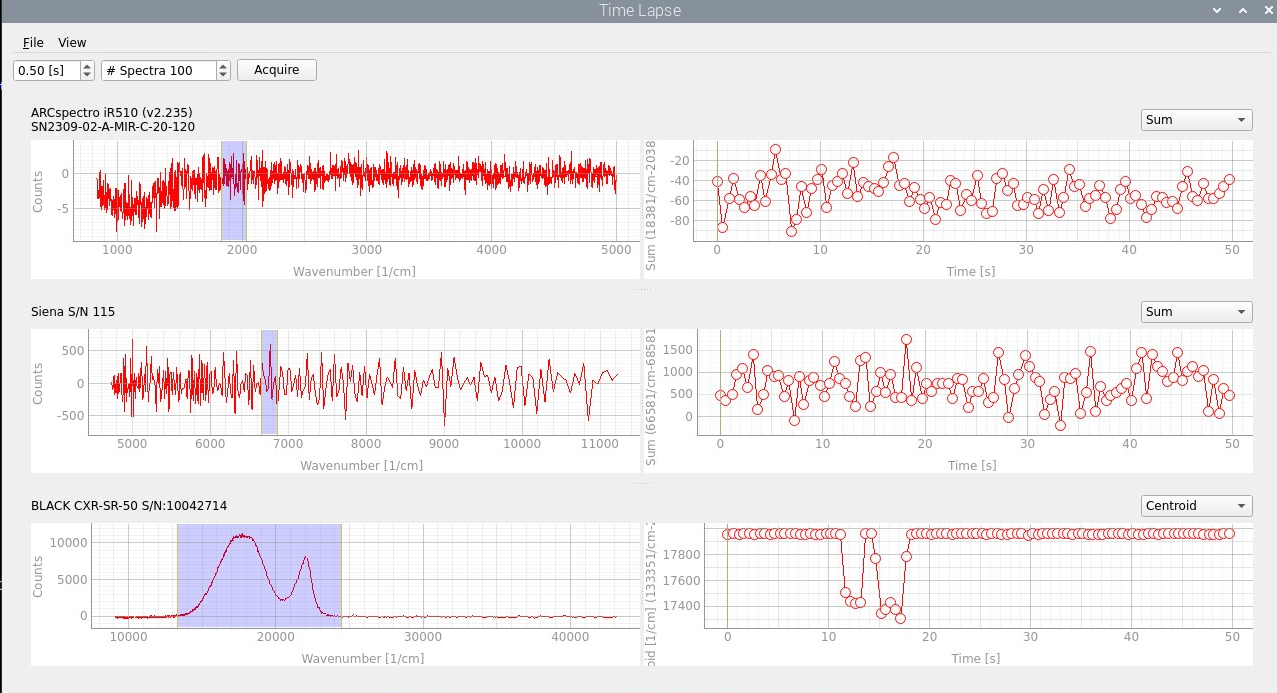
Fig. 2.25 Time-lapse recording using multiple spectrometers#
burst time-lapse recordings. Here,
only a single spectrometer is supported
graphical display is delayed or disabled until the recording is complete
timing is left up to the spectrometer hardware
if supported, spectra are buffered in spectrometer memory and read in bulk
This mode supports very fast acquisition rates > 1000 Hz (depending on spectrometer support). Burst recordings can be accessed using
Hint
Both time-lapse acquisition modes are compatible with external triggering (provided the spectrometer supports this) to carefully control timing and synchronization to an external signal. In this case, the expected spectral interval (exposure time or cycle time) should be smaller than the trigger interval.
2.4.1. Time-Lapse#
Conventional time-lapse recordings can be accessed using . In the time-lapse window, the following parameters can be configured:
- Interval Time
The time interval (in seconds between spectral acquisitions). This should be longer than the exposure time (multiplied by the number of averages).
- # of Spectra
The number of spectra to acquire
Hint
Other parameters can be configured in the main window. This includes
acquistion parameters (exposure time, averaging)
The Acquire button starts the time-lapse acquisition, which can be aborted by pressing the Stop button.
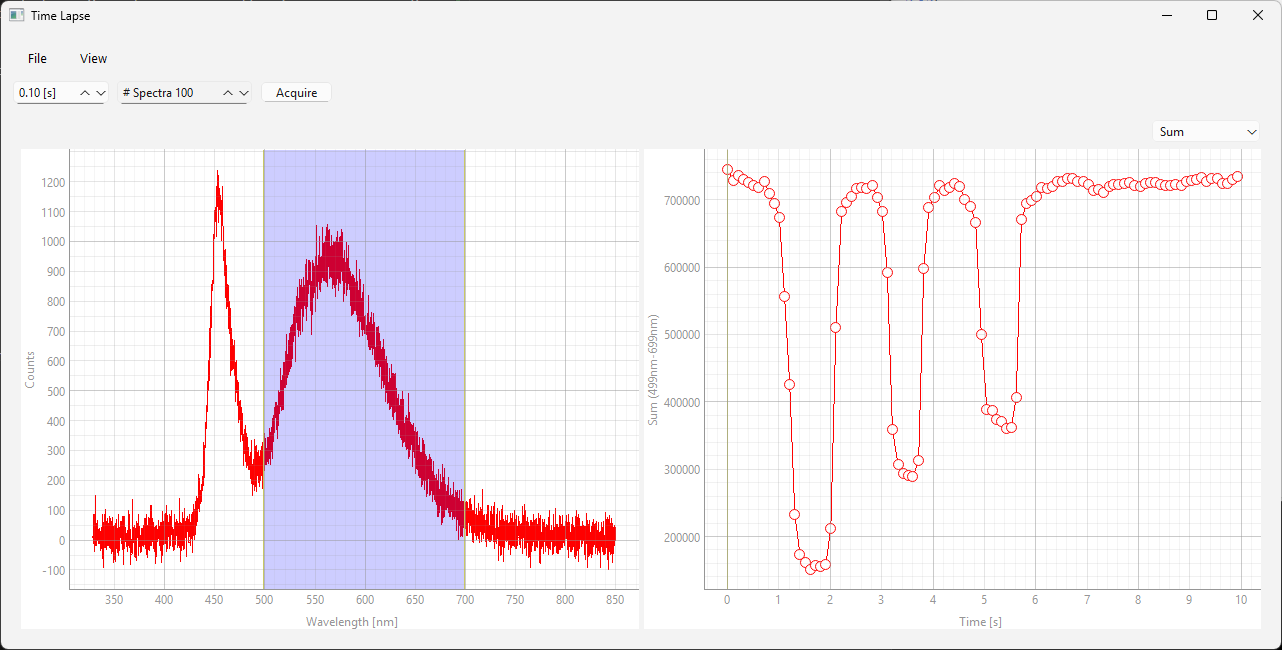
Fig. 2.26 The time-lapse window#
In the time-lapse window (Figure 2.26), the left pan contains the current spectrum. The right graph contains a plot of a selected spectral parameter vs the acquisition time.
the region of interest (blue box in the left graph) can be moved and resized using the mouse.
the currently displayed spectrum can be selected by dragging the vertical marker in the right graph
the displayed parameter can be selected using the drop-down menu at the top right
See also
Please see the section on time-lapse analysis for further details on parameter computation.
if multiple spectrometers are connected and active, a pair of spectrum and time-lapse graphs is displayed for each spectrometer, see Figure 2.25 for an example.
Time-lapse recordings can be saved to disk using . Available formats are .csv and .hdf5. Time-lapse recordings saved in the .hdf5 can be re-imported using for further analysis in TII Spectrometry.
Note
The listing below displays an example time-lapse .csv file.
             ,           0.0,          0.1,          0.2,          0.3
328.385131836,-22.7980957031,38.7015953064,5.24367284775,32.3832092285
328.552246094,30.9543762207,14.3859844208,0.124359227717,89.9606399536
the first row contains the timestamps in seconds.
the first column contains the wavelength / wavenumbers
the remaining columns contain the spectral intensity
2.4.2. Burst Recordings#
For supported spectrometers, burst acquisitions can be accessed using . In the burst acquisition window, the following parameters can be configured:
- Delay Time
Configures an additional wait time (in milli-seconds) between exposures. The cycle time is the sum of the delay time and the exposure + readout time. When external triggering is used, the delay time is the delay between the trigger and the start of the exposure.
- # Spectra
The number of spectra to record
As in software-controlled time-lapse recordings, other parameters can be configured in the main window.
The Acquire button starts the time-lapse acquisition, which can be aborted by pressing the Stop button.
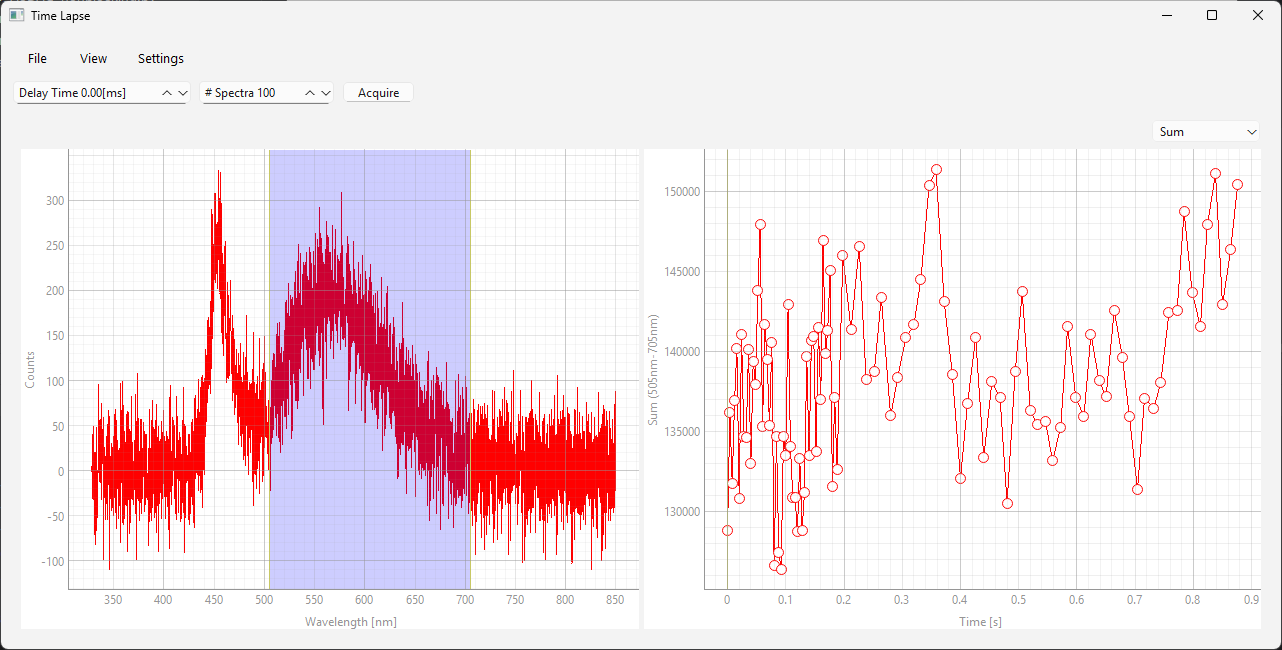
Fig. 2.27 The burst acquistion window#
The menu gives access to the following options:
When unchecked (the default), the display is only updated once the acquisition is completed. If checked, graphs are updated at regular intervals (but not in real time).
Additional spectrometer-specific settings also appear in the menu.
Adjusting the displayed data, saving, and loading data is performed in the same fashion as for conventional time-lapse recordings.